Remediation
Optimize365 can automatically fix security misconfigurations in your clients’ Microsoft 365 environments. This page covers how to enable remediation, how to run it, and how to undo a change.
Enabling Remediation
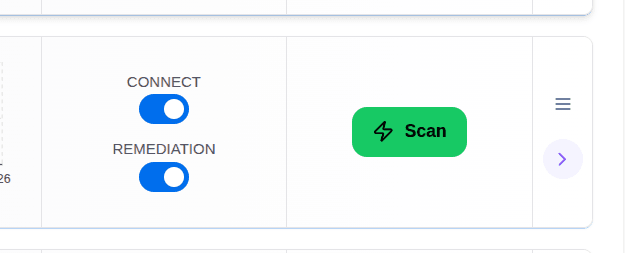
Remediation requires additional permissions beyond the standard read-only connection. To enable it, toggle the REMEDIATION switch on the client row.

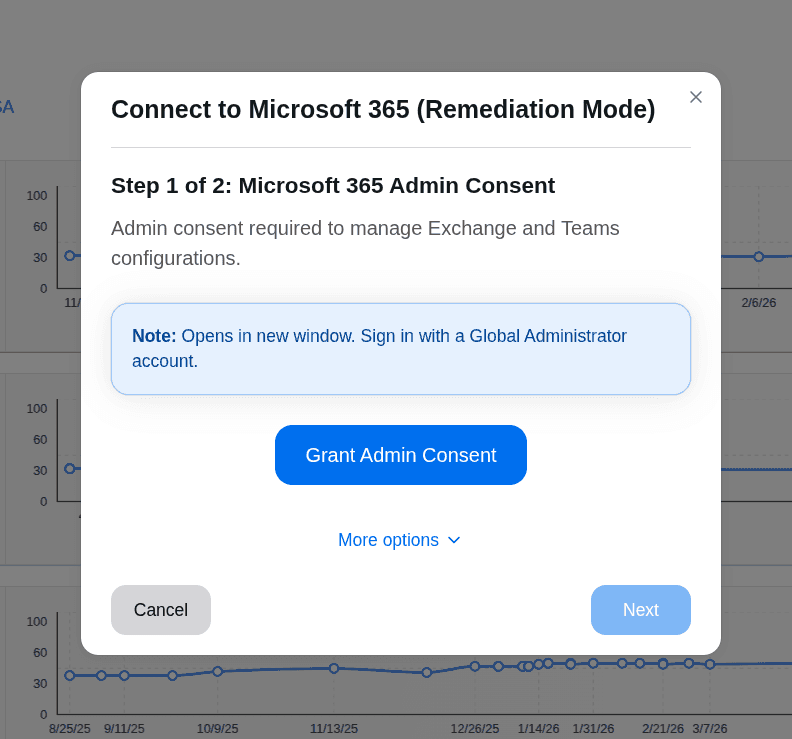
Step 1 of 2: Microsoft 365 Admin Consent
A dialog will open asking for admin consent to manage Exchange and Teams configurations. Click Grant Admin Consent and sign in with a Global Administrator account when prompted (opens in a new window).
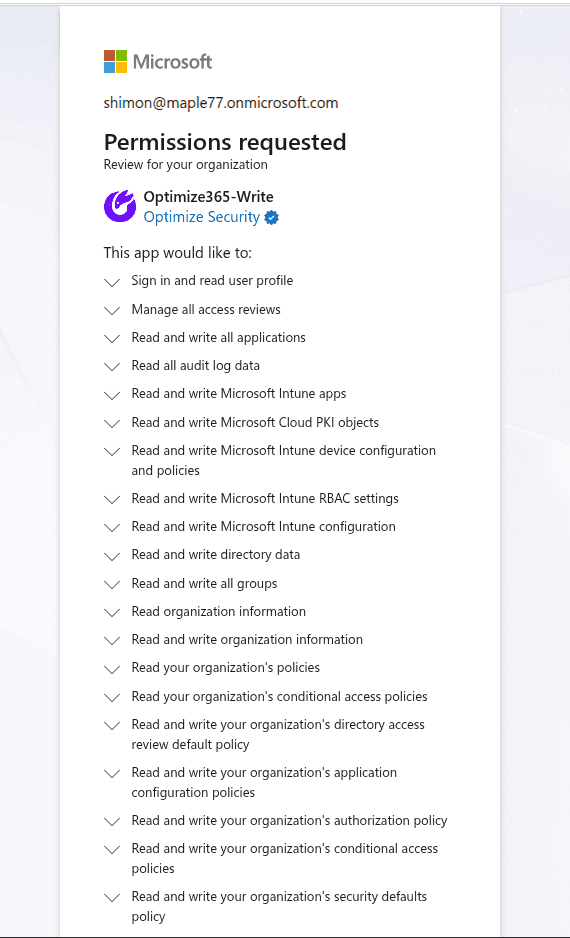
Microsoft will show a permissions review page for the Optimize365-Write app. Review the requested permissions and accept them.
Once accepted, click Next to proceed to Step 2.
Step 2 of 2: Exchange & Teams Administrator Permissions
Exchange Administrator, Teams Administrator, and related roles are required for remediation. These are granted via a Microsoft Device Login.
Click Start Device Login.
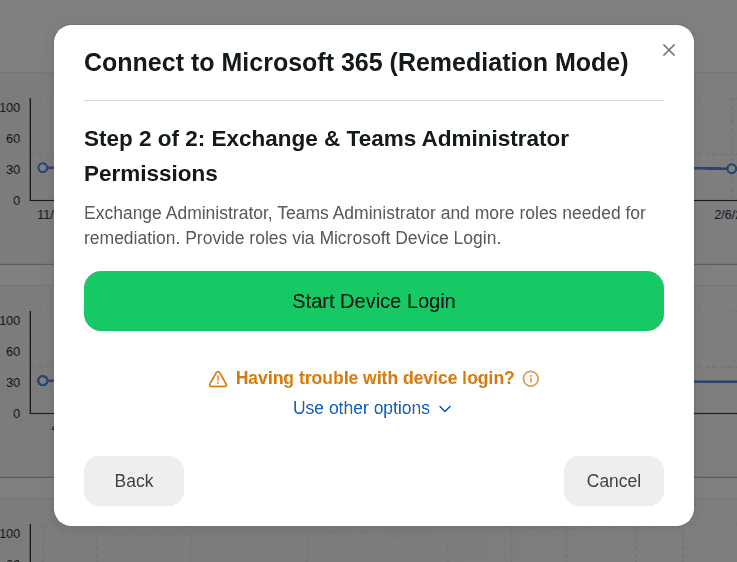
If device login is not possible in your environment, you can assign the required roles manually. See Manually Enabling Remediation Roles.
Follow the three steps shown:
- Copy the code displayed (valid for 10 minutes)
- Go to https://login.microsoft.com/device and paste the code
- Click Verify Role once you have completed the Microsoft login
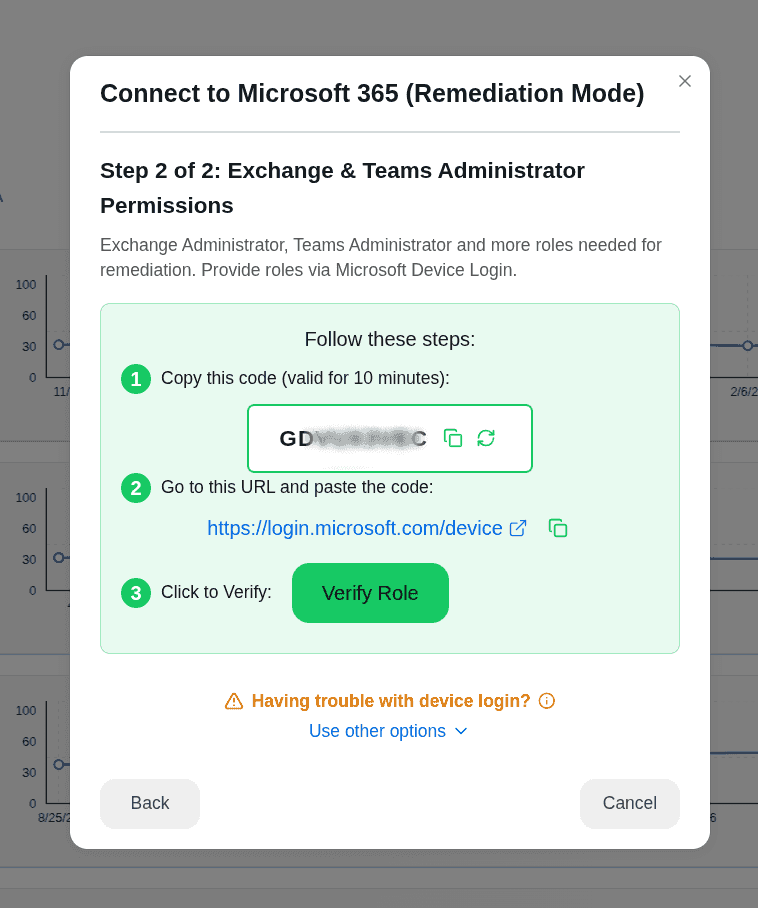
Once both steps are complete, the REMEDIATION toggle will show as enabled on the client row.
Running a Remediation
Once remediation is enabled, open any security control that is currently failing. At the bottom of the control detail page you will find an Auto-Remediate button. The page also shows:
- The exact configuration change that will be applied (shown as a script or diff)
- The estimated Remediation Effort in hours — this is how long the fix would have taken to perform manually, without Optimize365
- A Remediation Impact Prediction — which users, devices, apps, services, and processes will be affected

Review the impact prediction, then click Auto-Remediate to apply the fix. Optimize365 will execute the change and mark the control as compliant.
Undoing a Remediation
All remediations are logged in the Activity Log tab. Each entry shows the control that was remediated, the timestamp, and the account that performed the action. An Undo button appears next to each entry.
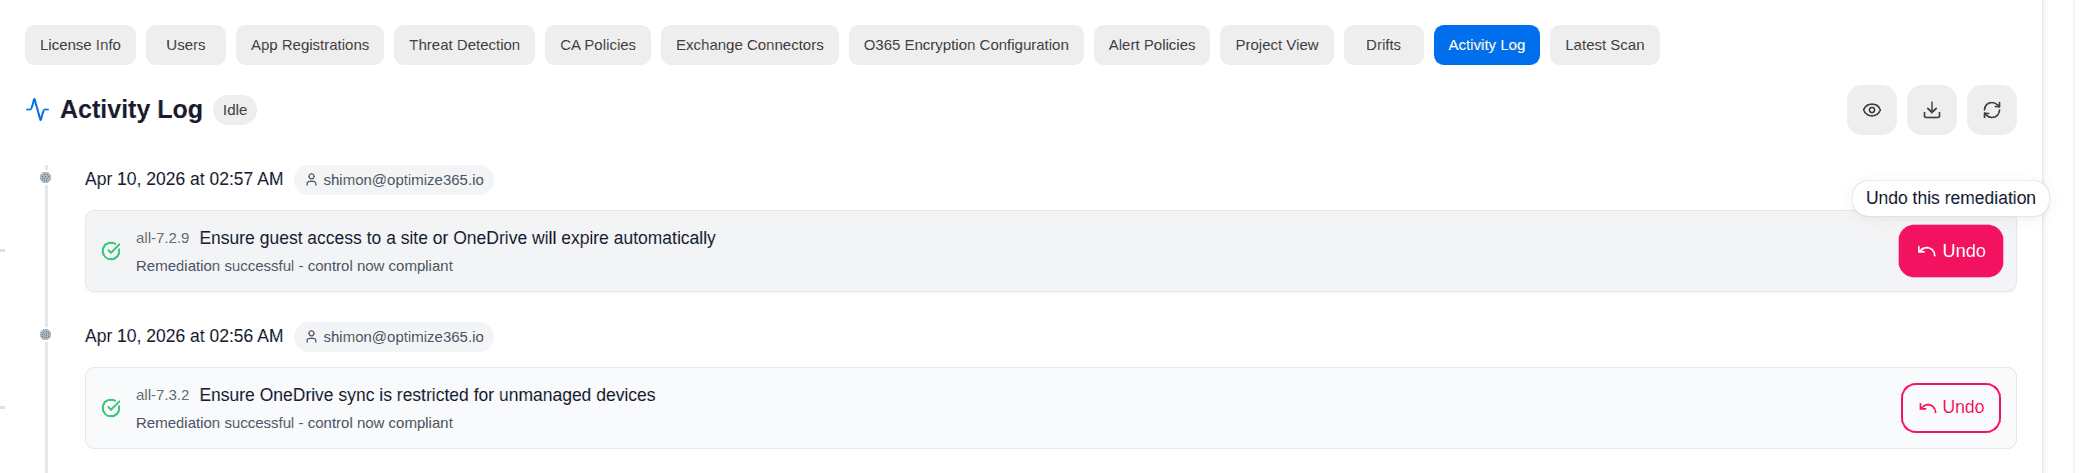
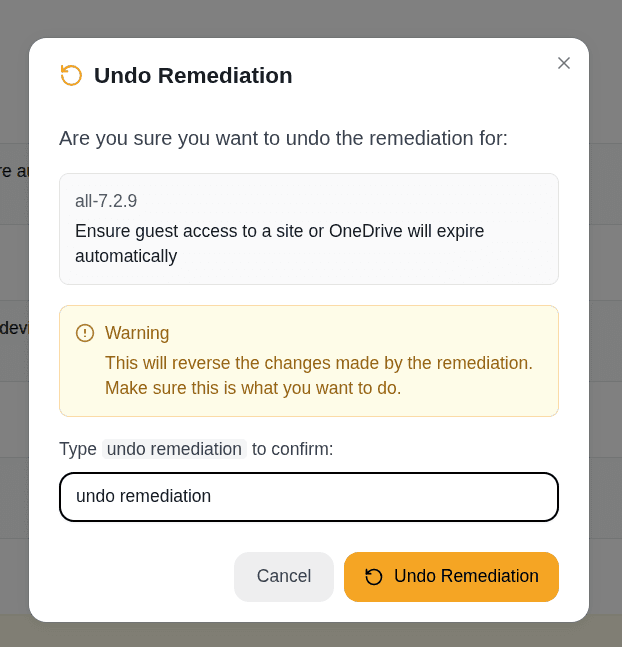
Click Undo on the remediation you want to reverse. A confirmation dialog will appear showing the control and a warning that this will reverse the changes made.
Type undo remediation in the confirmation field and click Undo Remediation to proceed.
Optimize365 will restore the previous configuration and the control will return to its prior state.
Each undo is independent and fine-grained — it reverses only that specific remediation. You are not rolling back to a point in time; other remediations you have run before or after it remain in place.