Getting Started
Welcome to Optimize365! This guide will walk you through everything you need to get started with our Microsoft 365 security and posture management platform.
Table of Contents
- Prerequisites
- Creating an Account
- MSP Organization Onboarding
- Connecting Optimize365 With Your Clients
Prerequisites
Before you begin, please ensure that your network is properly configured to access Optimize365 services.
To use Optimize365, you must ensure that DNS filtering is not blocking access to optimize365.io and its subdomains. If your organization requires specific domain whitelisting, please whitelist the following domains:
www.optimize365.iooptimize365.ioapi.optimize365.ioapp.optimize365.iologin.optimize365.ioclientp-login.optimize365.io
Creating an Account
Account Registration
-
Go to the Optimize365 App
Navigate to https://app.optimize365.io
-
Start Account Creation
If you don’t have an account, click on “New user? Create an account”
-
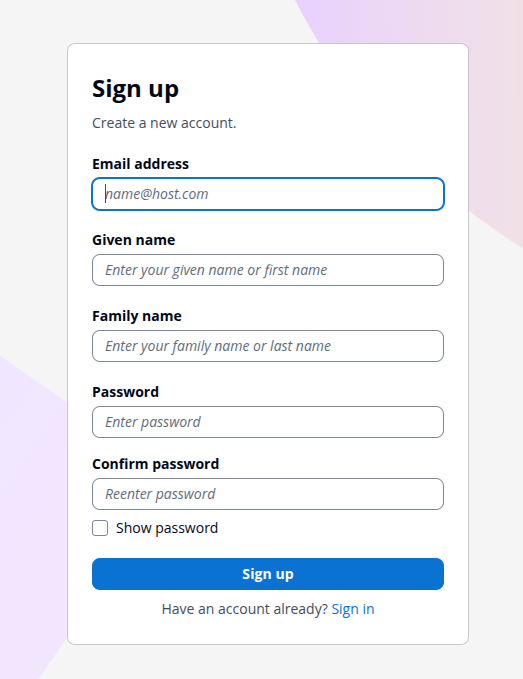
Fill Out Registration Form
Complete all required fields and choose a strong password:
-
Email Confirmation
An email will be sent to you to confirm your email address. Check your inbox and click the confirmation link.
Multi-Factor Authentication Setup
-
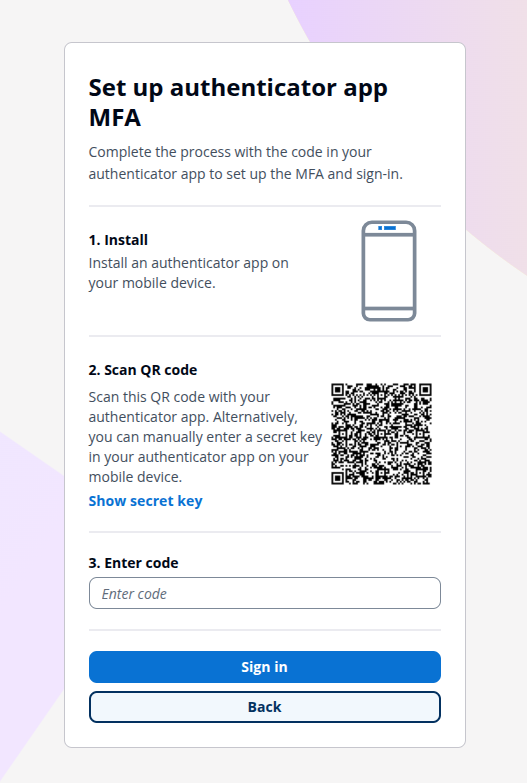
Set Up MFA
You will be prompted to set up Multi-Factor Authentication (MFA) using a QR code with an authenticator app (such as Google Authenticator or Microsoft Authenticator):
If you need help during this process, reach out via [email protected] or use the integrated chat feature.
MSP Organization Onboarding
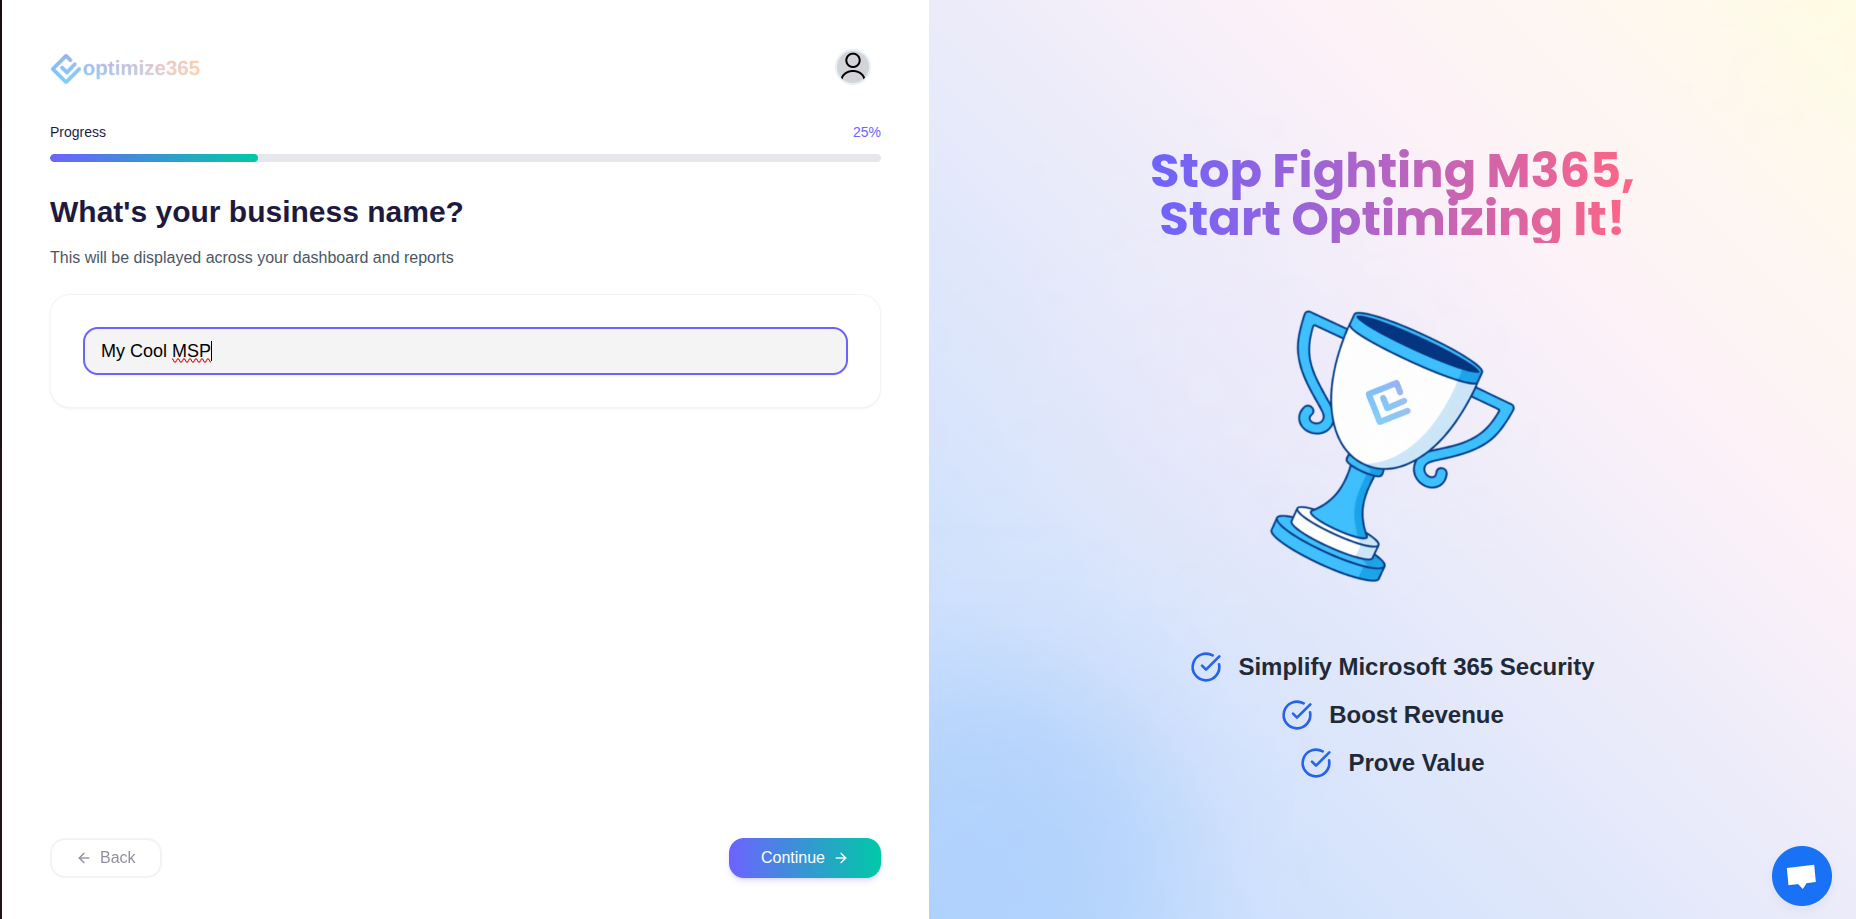
After completing your account setup, you’ll go through an onboarding process where we create your MSP organization. You’ll be asked to provide information such as your MSP name:
Connecting Optimize365 With Your Clients
Once your account is set up, you can start connecting your client environments to begin security scanning and management.
1. NFR (Not for Resale) License
You automatically receive an NFR (Not for Resale) license to connect your MSP’s own account for testing, learning, and evaluation purposes.
2. Initial Connection Process
-
Click on CONNECT to begin the admin consent process
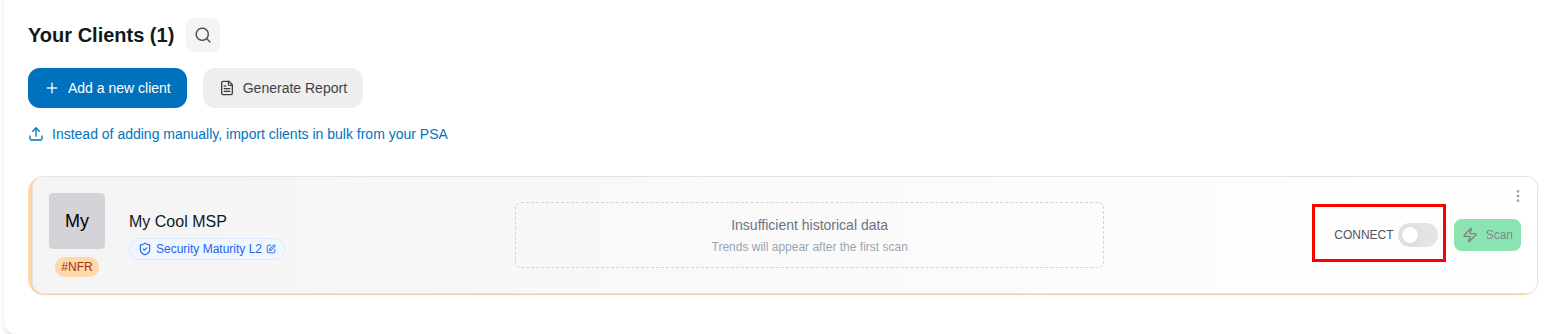
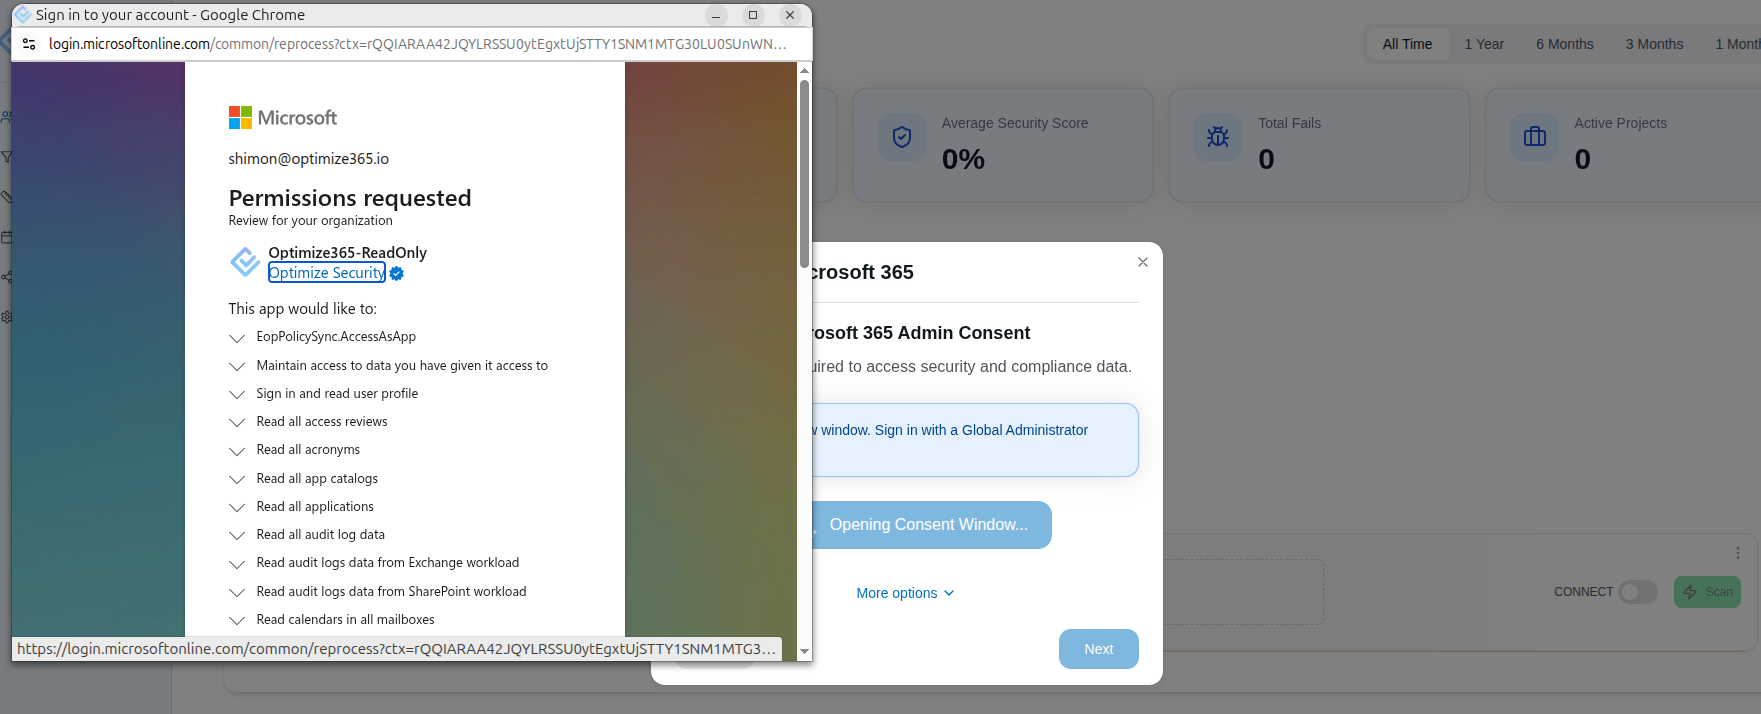
This initiates a read-only application registration that requires admin consent from your client’s Microsoft 365 environment.
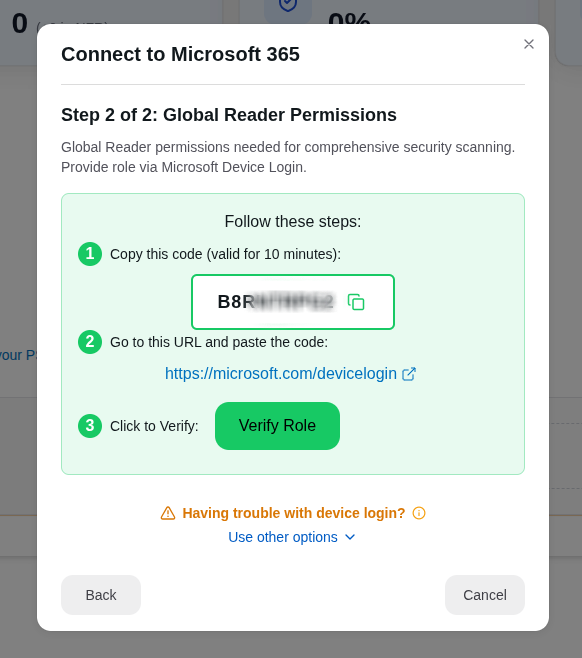
3. Global Reader Permissions
In addition to the basic permissions, we also need Global Reader access for comprehensive scanning capabilities. You’ll be prompted to complete a Device Login process:
4. Connection Confirmation
Once both the admin consent and Global Reader permissions are configured, the CONNECT toggle will show as enabled:
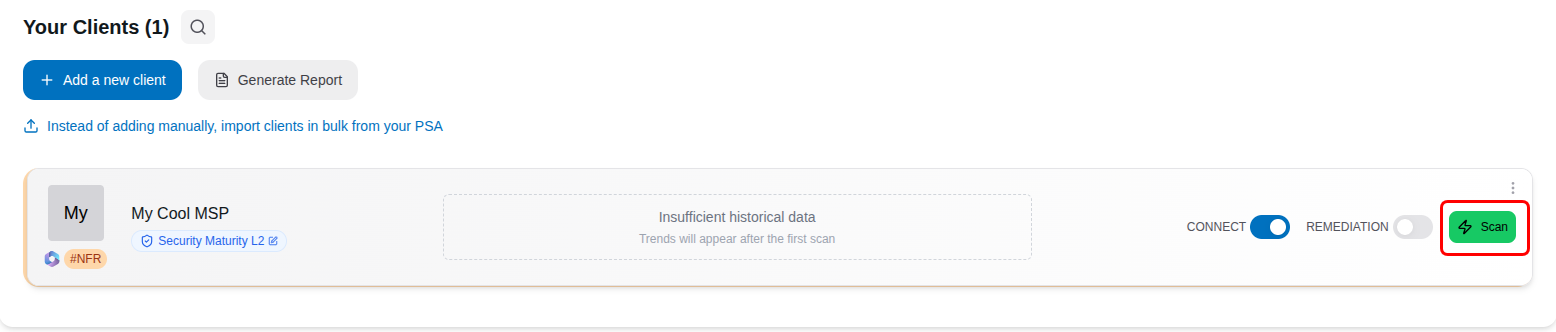
The same process applies for the remediation toggle if you want to enable remediation capabilities.
5. Start Scanning
After your client is successfully connected, you can start your first security scan to begin analyzing their Microsoft 365 environment for security misconfigurations, vulnerabilities, and compliance issues.
If you have any questions during the setup process, feel free to contact our support team at [email protected].